A flex sensor has numerous functionality, especially for gesture control of various electronics as the video below shows.
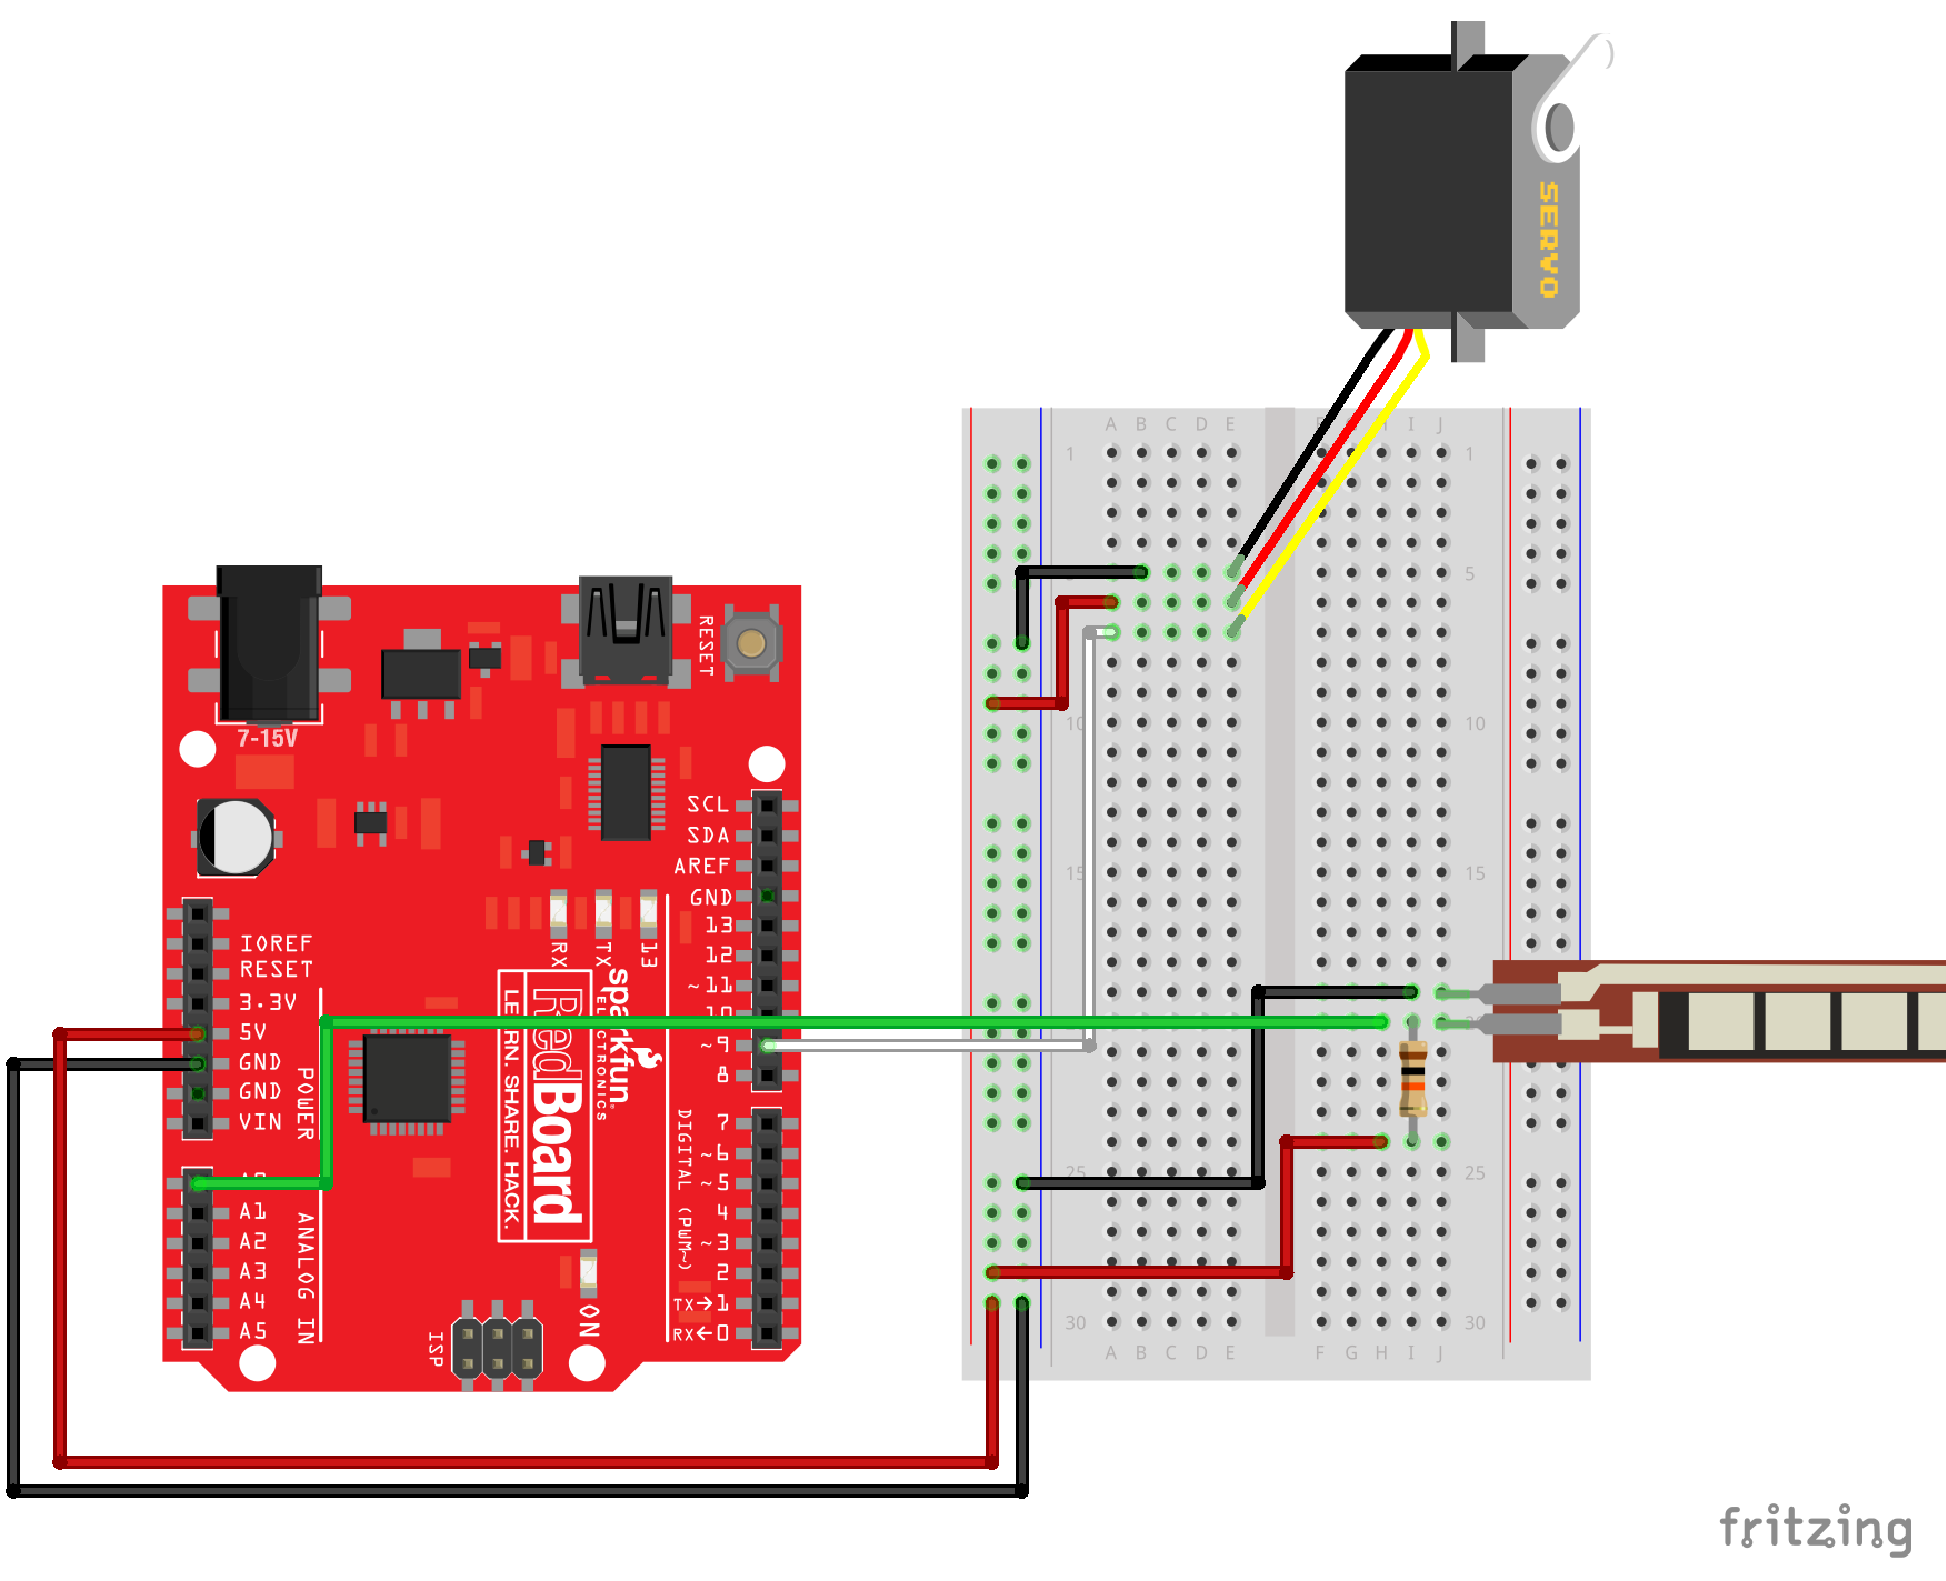
The diagram below from Sparkfun shows how to wire a flex sesnsor through a 10K voltage divider (the resistor). The servo can be ignored for the example below.

The video below shows the flex sensor in action. The number of LED's that go on is relative to how much the sensor is being bent.
int flexpin = 0;
int ledPins [] = {4,5,6,7};
void setup() {
Serial.begin(9600);
for (int i = 4; i < 8; i++) {
pinMode(i, OUTPUT);
}
pinMode(13,OUTPUT);
}
void loop() {
//digitalWrite(7,HIGH);
int flexposition;
flexposition = analogRead(flexpin);
int rate = map (flexposition, 780, 950, 0, 2000);
rate = constrain (rate, 0, 2000);
int intensity = map (rate, 0, 2000, 0, 4);
//Serial.println(intensity);
if (intensity > 0) {
for (int i=0; i < intensity; i++) {
digitalWrite(ledPins[i], HIGH);
}
}
if (digitalRead(ledPins[intensity]) == HIGH) {
Serial.println(intensity);
digitalWrite(ledPins[intensity],LOW);
}
}
//The code below does the same thing without using the last if statement. This is a less efficient
//way of accomplishing the same thing.
/*if (intensity < 4 && digitalRead (ledPins [3]) == HIGH) {
digitalWrite (ledPins [3], LOW);
}
if (intensity < 3 && digitalRead (ledPins [2]) == HIGH) {
digitalWrite (ledPins [2], LOW);
}
if (intensity < 2 && digitalRead (ledPins [1]) == HIGH) {
digitalWrite (ledPins [1], LOW);
}
if (intensity < 1 && digitalRead (ledPins [0]) == HIGH) {
digitalWrite (ledPins [0], LOW);
}
//delay(100);
}*/
No comments:
Post a Comment